Microgreens: The Fundamentals for a Successful Start
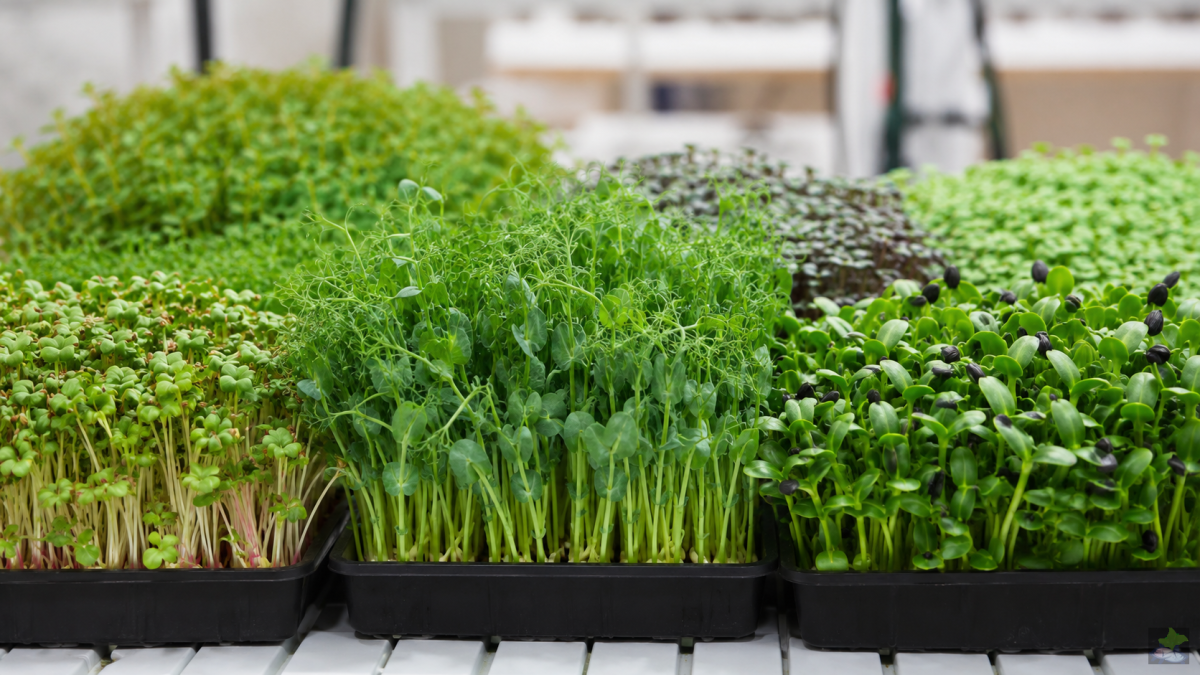
Microgreens can be grown in a small space and within a short period. Successful cultivation, however, does not come from using as much seed or water as possible, but from coordinating the species, germination capacity, substrate, light, air movement, irrigation and hygiene. This guide explains a reliable way to get started—from seed to harvest.
Basic principle: Uniform crops develop when seed quality, sowing density and moisture are properly matched. Light cannot later compensate for poor germination or inadequate hygiene.
What Are Microgreens?
Microgreens are young edible plants cut above the substrate after germination, usually when the first true leaves appear. The stems and leaves are eaten, but not the roots. This distinguishes them from sprouts, which are generally grown without substrate, under high humidity and often eaten with their roots. In developmental terms, microgreens occupy a stage between sprouts and baby-leaf vegetables.
Depending on the species and growing conditions, harvest is often about 7 to 21 days after sowing. Slower species can take considerably longer. Calendar values are therefore only a guide: the crop’s developmental stage, colour, strength, flavour and health are what matter.
Why Microgreens Are Suitable for Beginners
The short growing period makes errors visible quickly and allows rapid improvements. A shelf, shallow growing trays, a suitable light and a clean workspace are enough for initial trials. At the same time, simple equipment should not be mistaken for an undemanding process. Dense crops are sensitive to waterlogging, uneven sowing, poor air circulation and contaminated equipment.
Concentrations of vitamins, minerals and phytochemicals vary greatly between species, cultivars, growing conditions and the basis of measurement. Microgreens can be nutritionally interesting, but they are not universally a “superfood” and do not replace a varied diet. An extensive scientific review of composition and cultivationprovides an overview of the available evidence.
Suitable Species for Initial Crops
Robust, fast-growing species
Radish, broccoli, mustard, cress and rocket generally germinate quickly and reveal errors early. They are well suited to learning about irrigation, lighting distance and harvest timing. Peas and sunflowers produce sturdy shoots but require more seed, more space and particularly even water provision.
Slower or more demanding species
Beetroot, Swiss chard, coriander, basil and some amaranth cultivars germinate more slowly or unevenly. They are not unsuitable, but require more patience and closer control of temperature and moisture. For an initial comparison, two or three straightforward species are more useful than a large assortment.
Not every plant is suitable
Use only species whose young plant parts are suitable as food. Nightshades such as tomato, pepper, aubergine and potato are not customary microgreen crops; their young tissues may contain undesirable glycoalkaloids. For unfamiliar species, first verify their suitability as food using a reliable source, and only then sow them.
Seeds: Quality Before a Lower Price
Use viable, true-to-type seed that is expressly intended for food or microgreen production and has not been chemically treated or pelleted. Horticultural seed may be treated, so check the package label and supplier information. The Pennsylvania State University recommends high-quality, untreated and uncoated seed with good germination capacity.
Record the supplier, species, cultivar, lot number, purchase date and germination test. This is important not only for commercial businesses. Even in small-scale cultivation, it helps distinguish seed problems from problems caused by growing conditions.
Test germination before sowing
A simple germination test prevents entire trays from being filled with weak seed. For example, count out 50 or 100 seeds, place them on moist, clean paper and keep them under conditions suitable for the species. The number of normally developed seedlings gives the germination rate.
If 86 out of 100 seeds germinate normally, germination capacity is 86%. Low or greatly delayed germination cannot reliably be offset by an extremely high sowing density. Instead, this produces a crop at different developmental stages and increases the risk of moist, poorly ventilated areas.
Prepare Trays and Growing Area
Shallow, food-safe trays with drainage holes are practical for beginners. A solid lower tray allows bottom watering. All trays must be stable, undamaged and easy to clean. Wooden crates, absorbent construction materials and containers with inaccessible areas make controlled hygiene more difficult.
The growing area should be easy to clean and protected from pets, soil from houseplants, splashing water and other sources of contamination. Arrange lights and shelves so that condensation cannot drip onto the plants and every tray can be inspected.
Select the Right Substrate
Substrate-based cultivation
Fine-textured, structurally stable propagation substrates, coconut products or suitable fibre mats can work well. The material must absorb water while retaining air in the root zone and must be free from problematic contamination. Very coarse particles make uniform sowing difficult; compacted or permanently wet material promotes oxygen deficiency.
Hydroponic mats and systems
Fibre or textile mats simplify clean harvesting, but the quantity of water they retain varies greatly by material. Hydroponic does not automatically mean more hygienic: water quality and clean reservoirs, pipes and tools remain essential. A scientific review of environmental and cultivation factors shows how strongly substrate, nutrient supply, light and climate interact.
Reuse the substrate?
For beginners, fresh, suitable material for each crop is the safer option and makes comparisons more reliable. Root residues, organic matter and pathogens are difficult to remove completely from used mats or densely rooted substrate. Compostable materials can be directed to suitable recovery after harvest, but should not return to the next tray without assessment.
Determine Sowing Density Systematically
A universal number of grams per tray is of little practical value. Thousand-seed weight, germination capacity, seed size, growth habit and desired harvest stage vary considerably. Small seeds are distributed densely but preferably in a single layer; large seeds require substantially more space.
Weigh the seed used in each tray and record yield and quality characteristics. Start with the seed supplier’s recommendation and change only one factor at a time. Sowing too thinly wastes space; sowing too densely produces weak stems, persistent leaf moisture and uneven crops.
Sow and Manage the Germination Phase
Moisten the substrate evenly before sowing, but do not saturate it. Distribute the seeds without large gaps or thick clusters and press them down gently. Whether pre-soaking is useful depends on the species. Large seeds such as peas often benefit, whereas highly mucilaginous seeds are not treated in the same way.
Many species initially germinate under a cover or light, even pressure. This supports contact with the moist substrate. The cover must not, however, create an uncontrolled humid chamber. Inspect the trays daily and move them into the light promptly once the seedlings reach the intended developmental stage.
Coordinate Light Intensity, Duration and Distance
Why window light is often insufficient
Daylight may be adequate in bright locations, but varies greatly throughout the day and across seasons. In insufficient light, seedlings elongate, remain soft and fall over more easily. Uniform LED lighting makes crops more comparable and supports repeatable workflows.
No universal lighting formula
Light intensity, spectrum and daily lighting duration affect yield, colour, form and composition. More light is not automatically better: excessive intensity increases energy demand, leaf stress and, depending on the setup, temperature. Studies also show marked species-specific responses. One example is this study of light intensity and spectrum mixtures.
For a start, mount lights according to the manufacturer’s instructions and then assess them by observing the plants. Long, pale stems often indicate insufficient usable light; bleaching, dry margins or excessive heat may indicate excessive exposure or insufficient distance. A timer provides a consistent day–night cycle.
Temperature, Humidity and Air Movement
Many common species develop well at normal indoor temperatures, but each species has its own optimum range. The temperature in the moist root zone matters as well as air temperature. Very warm, wet trays increase the risk of microbial problems; cold slows germination and growth.
Gentle air movement helps remove moisture and produce sturdier plants. A strong airflow directed continuously at the trays dries the edges and creates uneven crops. Measure temperature and relative humidity at plant height rather than elsewhere in the room.
Water Correctly
Keep moist, do not flood
Seeds must not dry out during germination. At the same time, oxygen must reach the roots. Once established, bottom watering is often advantageous because leaves and stems remain drier. Excess water must not remain permanently in the lower tray.
Assess irrigation needs
Do not water solely according to the clock. Tray weight, substrate colour and surface, and plant firmness provide better indications. Edges often dry more quickly. Record the quantity and timing of irrigation before using automated systems.
Water of suitable drinking-water quality must be used for every stage. The Penn State Extension guidance on food safety emphasises the importance of microbiologically suitable water for soaking, rinsing, irrigation and post-harvest work.
Do Microgreens Need Fertiliser?
Many species harvested quickly initially use the seed’s reserves and can grow without additional fertiliser in a suitable substrate. For longer crops, low-nutrient mats or consistently high production, a weak, controlled nutrient solution may be useful. The need must be assessed according to the species, system and water quality.
A concentrated nutrient solution does not automatically accelerate the crop. Excessive salt concentrations can impair germination and water uptake. Anyone using fertiliser should document the concentration, pH, source water and plant response and should not use products unsuitable for edible crops.
Hygiene as Part of Cultivation
Distinguish cleaning from disinfection
First remove organic residues mechanically, then clean surfaces with a suitable detergent. An approved disinfection method can work reliably only on a clean surface. Concentration, contact time, temperature and rinsing requirements depend on the product label and application.
A simple hygiene routine
- Wash hands thoroughly and wear clean clothing before starting work.
- Separate dirty and clean trays in space or time.
- Clean scissors, scales, work surfaces and harvest containers before use.
- Use only clean water and verified seed.
- Discard entire crops that are diseased, slimy or have an unusual odour.
- Document lots and deviations.
The warm, moist conditions needed for germination can also favour microorganisms. Prevention is therefore more effective than attempting to “wash clean” a problematic product afterwards. Although the US FDA distinguishes microgreens from sprouts, both product groups require consistent control of potential contamination routes. Commercial production is also subject to all applicable European, national and local food-law requirements.
Distinguish Mould, Root Hairs and Damping-Off
Fine white root hairs occur uniformly and directly on the roots and often appear to disappear when moistened. Fungal mycelium, by contrast, may spread irregularly across seeds, substrate and neighbouring plants and may be accompanied by discolouration, odour or soft tissue. Nevertheless, a remote diagnosis based solely on a white coating is unreliable.
Seedlings that collapse and are constricted at the stem base may indicate damping-off. Common contributing factors include excessive sowing density, permanently wet substrate, inadequate air movement, contaminated trays and unsuitable temperatures. Affected crops do not belong on sale or on the plate.
Harvest Timing and Technique
Harvest when the plants reach the desired size, colour, firmness and flavour intensity. Cut above the substrate using a clean, sharp blade. Substrate particles, seed coats and damaged plant material must not enter the packaging.
Whenever possible, harvest dry crops. Wet leaves increase the work required for gentle drying and can reduce storage stability. Do not use tools between problematic and healthy trays without cleaning and, where necessary, disinfecting them again.
Storage and Use
Microgreens are delicate fresh produce. After harvest, they should be cooled quickly, protected from compression and stored as dry as possible. Condensation inside closed containers promotes loss of quality. Shelf life depends on the species, harvest hygiene, temperature, packaging and initial quality; a blanket shelf-life promise is therefore not credible.
Before consumption, discard products that are spoiled, slimy or have an unpleasant odour. People at particular risk should follow individual medical or official food-safety recommendations.
A Repeatable Initial Trial
- Select one robust species and a documented seed lot.
- Conduct a germination test and measure the tray area.
- Prepare three identical trays with the same quantity of seed and the same substrate.
- Record the temperature, sowing date, lighting time and irrigation volume.
- Change only one factor between subsequent crop cycles.
- Record the harvest day, fresh weight, appearance, flavour and losses.
This approach produces more meaningful results than testing several cultivars, substrates and lighting programmes simultaneously. A small number of carefully documented crops can gradually provide a reliable production protocol for your own location.
Common Beginner Mistakes
- Excessive sowing density: The centre of the crop remains moist for too long and becomes unstable.
- Watering to a rigid schedule: Weather, plant mass and evaporation are ignored.
- Lighting too late: Seedlings become long, pale and vulnerable.
- A strong fan blowing directly: The edges dry out while the centre remains moist.
- Unsuitable seed: Treatment, low germination or a lack of traceability creates avoidable risks.
- Missing records: Good results cannot be reproduced.
Conclusion: Control Beats Complicated Technology
Good microgreens do not require the most complex possible installation. What matters is suitable seed, uniform sowing, an airy, water-retentive substrate, irrigation according to need, appropriate light and a consistent hygiene routine. Start small, measure the key factors and change only one variable per crop cycle.
This turns a quick kitchen experiment into a manageable growing process—and later, if required, a reliable foundation for larger shelving units, hydroponic systems or commercial production.
Further Technical Sources
- Penn State Extension: The ABCs of Microgreens
- Penn State Extension: Ensuring Food Safety in Microgreens Production
- Bhaswant et al.: Microgreens – A Comprehensive Review
- Dubey et al.: Microgreens Production – Environmental and Cultural Factors
- Mir et al.: Effects of Light Intensity and Spectrum Mix
- FDA: Guidance on Sprouts and the Distinction from Microgreens